

How To Clean A Smith And Wesson Bodyguard 380
How to Disassemble, Clean and Lubricate a Smith & Wesson M&P Bodyguard 380
I am going to show you lot stride-by-step how to disassemble and make clean a Smith & Wesson Bodyguard .380 pistol. From the field stripping to complete lube and reassembly, this tutorial volition let yous how to speedily and confidently perform this task in fifteen-20 minutes. After y'all have washed this one time, yous volition be able to do it even quicker the adjacent time without instructions.

If you accept never tried to take down (field strip) your M & P Bodyguard .380, information technology can be tricky the kickoff fourth dimension as the accept down pivot is small and not the easiest to deal with. A fiddling instruction is all you will need, and then the rest is easy.
Bodyguard 380 cleaning Supplies
Hither are the supplies you will demand to consummate the disassembly, reassembly and cleaning of the S & W Bodyguard 380 pistol. There are lots of unlike cleaning products, so I will listing the ones I accept used for years of trouble free results.
Brownells also carries all the products you need to clean your handgun. Check them out hither: Handgun Cleaning supplies.
- Hoppes No. 9 Gun Cleaning Solvent or try the best, Veteran Owned Original Gun Oil (Use Discount Code SAVEWITHDAVE)
- Micro Fiber cloth or soft newspaper towels
- Cotton swabs or lint-free swabs
- Hoppes Boresnake or equivalent (easiest way to clean the inside of the barrel)
- Rod and patches (if y'all do non have a Boresnake)
- Skid 2000 EWL or try the best, Veteran Owned Original Gun Oil
- Minor screwdriver
- Gun Scrubber Synthetic Safe cleaning solvent
Here are the steps to Field Strip and clean the Smith & Wesson Babysitter .380 pistol:
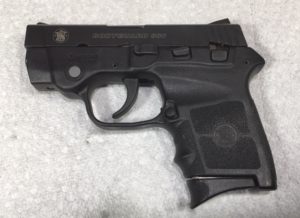
Unload the gun
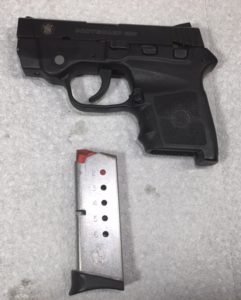
This is the nearly important step. Eject any magazine that is in the gun, and then remove the round in the sleeping accommodation. Exist sure to do information technology in that gild! Magazine start, then empty the chamber! Remove whatsoever and all ammo from the area.
Repeat Pace ane. Verify the gun is completely unloaded
This step is in case you skipped step number one.
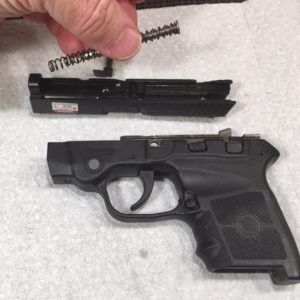
Remove the slide, barrel, recoil spring and guide rod
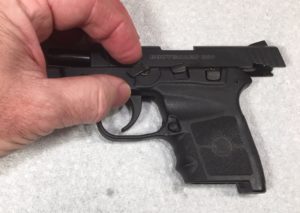
Lock the slide to the rear using slide stop lever.
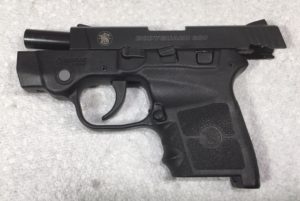
Move have-down lever to half-dozen o'clock position, forcing if necessary
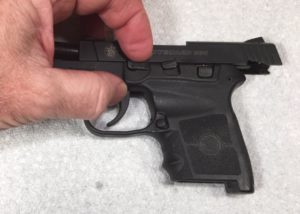
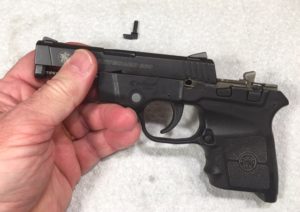
Move the accept-downwards lever back and forth until you can grasp it and remove it
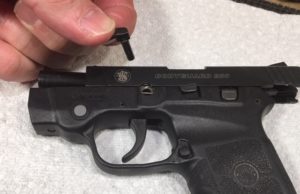
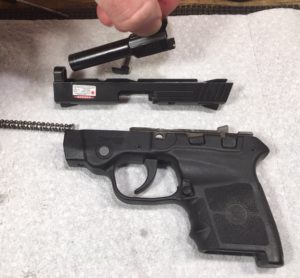
Move the slide forward and off the front of the gun frame.
Turn the slide upside down and remove the guide rod Carefully every bit it is spring-loaded.
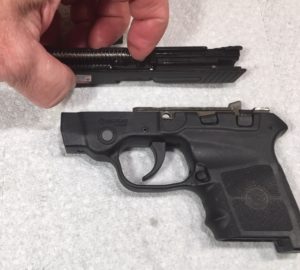
Remove the butt from the slide.
Make clean barrel and guide rod
Utilise Hoppes Number nine solvent & a rag or cotton wool swabs to clean the recoil spring and guide rod assembly. Run a Boresnake through the butt a couple times. Wipe whatever remaining solvent off with a cloth or paper towel.
Clean the gun frame
Employ Hoppes #9 solvent and a paper towel or cotton swabs to clean all surfaces of the frame, specially the rails where the slide contacts the frame. On the Bodyguard and other guns that have a polymer (plastic) frame, do non get Hoppes No. nine solvent on parts that are not metal.
The best way to clean a polymer frame is to spray information technology downwardly with Birchwood Casey Synthetic-safe Gun scrubber or equivalent. After using either cleaner, apply a paper towel or rag to wipe any excess solvent off of the frame.
Clean the Slide
Use Hoppes No. 9 solvent and a cotton swab or paper towel to clean the inside of the slide, peculiarly the areas that contact the frame rails during functioning.
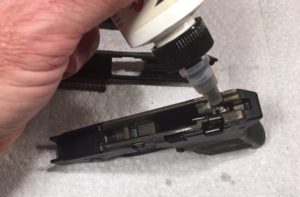
Lubricate
Using a quality lubricant such as Frog Lube, Sideslip 2000 (my preference as this is thicker than nigh and stays on the gun a long fourth dimension) or Tri-menstruation superior Lubricant, use just a few drops to the following areas:
Frame:
- Track
- Hammer pivot
- Slide stop
- All moving parts in trigger control area
Slide:
- Rails
- Hammer cocking surface
- Firing pin aperture
No demand for more than a few drops. The oil will move effectually on its ain and coat the necessary surfaces.

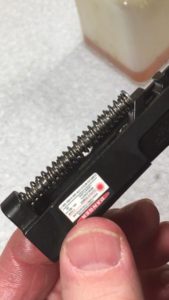
Reassemble the gun
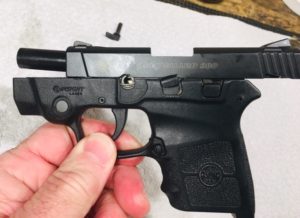
This role is very piece of cake once you practise it a few times. Set the slide upside downwardly and put the butt into the slide. And so identify the recoil leap assembly on top and press on the terminate so information technology fits in the groove on the butt every bit shown in the picture.
And then line upwardly the slide with the frame and slide it on. Movement information technology to the rear and lock the slide back with the slide lock lever.
Be certain the barrel is all the way forrad.
Now insert the take-downwardly pivot onto the hole, with the lever in the 6 or iii o'clock position, and press it into the gun until fully seated. This may take some twisting of the lever to get it to go in.

Be sure the lever is dorsum in the original position, at iii o'clock.

Piece of work the slide back and forth several times to be sure it operates properly, and to allow the lube to spread into all the areas that move.
Lastly, y'all tin test the functionality of the gun by taking some dummy rounds and loading the gun with them. At present make sure a round is ejected every time to rack the slide to the rear.
Also see my commodity on How to Make clean a Springfield XD or XDm pistol.
The gun is now fully assembled and ready for another day at the range, or to slide into your DeSantis Die Difficult Ankle Holster!
Bodyguard 380 Disassembly and Cleaning Video
Thanks for reading my tutorial on cleaning a Smith and Wesson Bodyguard .380 pistol! I hope this has helped you out. Besides see my tutorial on Cleaning a Kimber 1911 Pro Bear Two.
Please leave a comment accident if you accept any improvements I could make, or to share your experience with this gun.

Source: https://kydexowbholsters.com/how-to-clean-a-bodyguard-380
Posted by: klingtabounce1940.blogspot.com
0 Response to "How To Clean A Smith And Wesson Bodyguard 380"
Post a Comment